I received an invite for the Hawken closed beta so I thought I would check it out.
In case you don't know Hawken is a "mech" based shooter that will be available free-2-play later this year.
I'm just going to make this quick here.
Graphics: Really good, much better than most free-2-play titles I've tried.
Game play: There are several modes in Hawken and I was not able to try them all since there are issues with joining servers in the beta. I was able to play death match, team death mach, and one round of siege. The game mechanics of Hawken make regular death match just feel kind of silly. From my experience you are able to take down one mech in a toe to toe duel and by that time your mech is messed up enough that you can survive another fight unless you repair. There is also a good chance that your weapons will have over heated in the dog fight and you wont be able to battle till they cool off. In case you haven't figured it out this is the difficulty with standard free for all death match games you basically bust one mech and then get popped yourself.
Team death match is a mixed bag because if you can get people you don't know to work together you are golden but if you are on a team that is going solo everywhere its not going to go well for you.
I was confused about the siege match I played since there really isn't a tutorial for the game or tips or any guides. I was able to figure out that you need to collect energy and return it to your base to get a warship. The attack/defense part of it was confusing. I think you need to defend your anti air artillery while collection energy to fuel your battleship while destroying the enemy anti air artillery. That's my guess. I didn't accomplish much besides collecting some energy and defending the base. I got stomped pretty good trying to attack with my brute.
So far Hawken is a pretty good game but I'm looking forward to the bugs getting ironed out. We'll see how she looks when release time rolls around.
Sunday, October 28, 2012
Friday, October 26, 2012
Borderlands loot chest pc - update
This is an older post that didn't make it up when it was supposed to because I didn't push the button... fail. Here it is now though. I'm no artist but I think you get the general idea.
======================================================
I did a couple of preliminary sketches.
 I don't intend to use the in game color scheme. I was thinking more gun metal and red at the moment but since this thing is only in the planning stages at the moment who knows what color it will end up being.
======================================================
I did a couple of preliminary sketches.

My first sketchup
Today I made my first sketchup and here it is.
 I did a mock layout for my borderlands loot case.
It is kind of rough because I had no idea what I was doing. I saw a whole bunch of posts from people who do builds with sketchup mock ups and I thought I'd give it a try. I think it came out pretty good for me being a newb. Sketchup is really neat and way easier to run than learning CAD. If you want to do some similar modeling and don't want to put a bunch of time and money in to get it done, this is the way to go. Get sketchup here.

It is kind of rough because I had no idea what I was doing. I saw a whole bunch of posts from people who do builds with sketchup mock ups and I thought I'd give it a try. I think it came out pretty good for me being a newb. Sketchup is really neat and way easier to run than learning CAD. If you want to do some similar modeling and don't want to put a bunch of time and money in to get it done, this is the way to go. Get sketchup here.
Thursday, October 25, 2012
Battery has arrived
Good news, the new BP7X battery I ordered has arrived. Time to charge this puppy up and get to flashing. ;)
Also received an invite for the HAWKEN closed beta weekend. :)
Phone update: It's been running on the new battery for over 9 hours and I'm still above 70%. Maybe I'll stick with what I am running instead of flashing a newer CM9 build onto the old Droid 2 Global.
Also received an invite for the HAWKEN closed beta weekend. :)
Phone update: It's been running on the new battery for over 9 hours and I'm still above 70%. Maybe I'll stick with what I am running instead of flashing a newer CM9 build onto the old Droid 2 Global.
Wednesday, October 24, 2012
Phone update time
I ordered a new battery for my Droid 2 Global yesterday. When it arrives there will be phone updating to do. Stay tuned.
Currently running Gummy 1.2.0 and it's pretty sweet. Thinking about going to CM9 though. We'll see what I decide when the battery gets here. I love gummy too bad it was discontinued.
Currently running Gummy 1.2.0 and it's pretty sweet. Thinking about going to CM9 though. We'll see what I decide when the battery gets here. I love gummy too bad it was discontinued.
Monday, October 22, 2012
Tuesday, October 16, 2012
Site Update
Site update today.
Added:
This thing is really starting to come together. I'm thinking the header could still use some work but its not bad for a first attempt. I'll try to have another go at it when I get a chance.
Added:
- Background Pattern
- Custom Header Image
- Background Color
- Link Font Color
This thing is really starting to come together. I'm thinking the header could still use some work but its not bad for a first attempt. I'll try to have another go at it when I get a chance.
Monday, October 15, 2012
Power update
Good news!
 The replacement power supply I ordered has arrived. I picked up a 675w Thermaltake Toughpower XT from the EGG that was on sale plus an extra 20% off. This isn't the power supply I am going to run when I get around to doing my new build but it will rock this box for as long as it holds out.


 The replacement power supply I ordered has arrived. I picked up a 675w Thermaltake Toughpower XT from the EGG that was on sale plus an extra 20% off. This isn't the power supply I am going to run when I get around to doing my new build but it will rock this box for as long as it holds out.


Thursday, October 11, 2012
Bah, fail
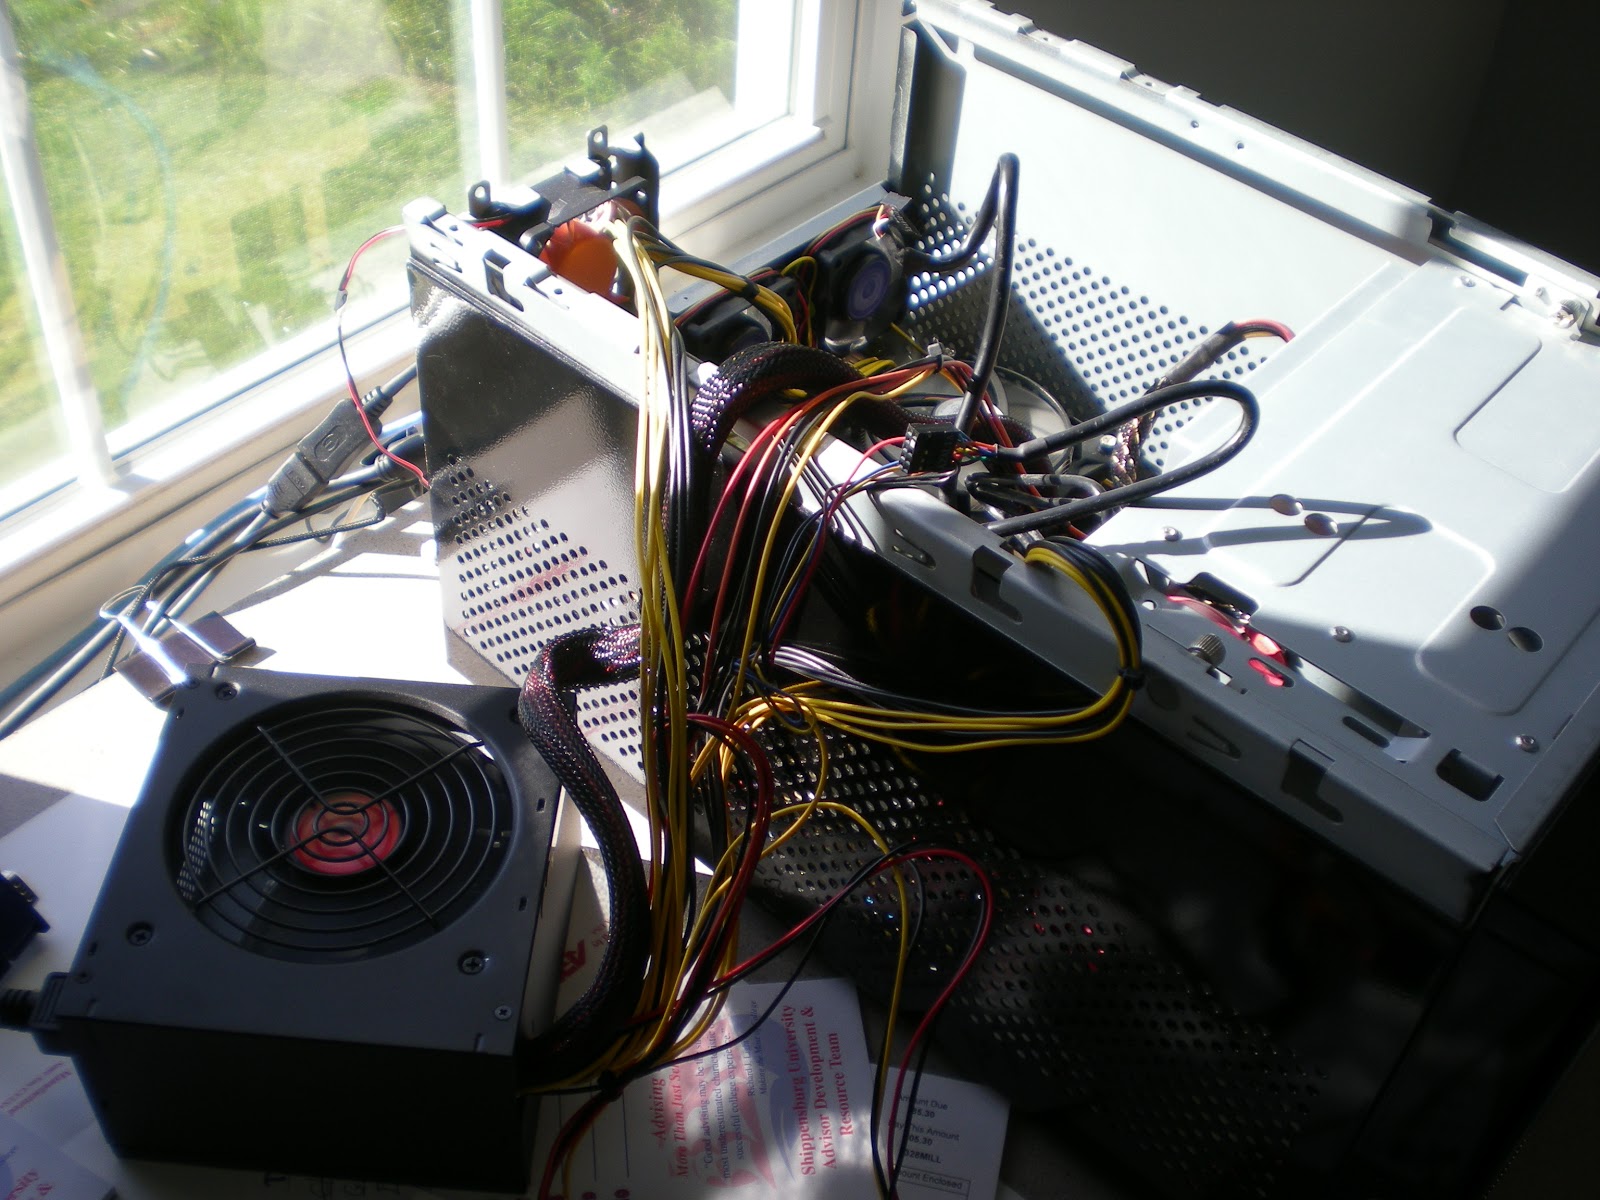
Bad news. Yesterday I get home from work and go to turn on the desktop, it clicks on and then off. Long story short after a couple hours of troubleshooting. The old Enermax Liberty has crapped out. This is only the second power supply that I've ever had fail. I've been running the girl pretty hard for the past five years. Guess she finally gave up. I don't have an extra laying around anywhere so I guess I need to run out and pick one up this morning.
Judging by the way its acting I'd have to guess that a voltage regulator died and its no longer sending a good power signal to the motherboard. I check the voltage for the pins in the connectors and they are all good for the two seconds the thing turns on for. Anyway off to find a quick replacement that will cost too much because I need it now.
Update: Morning power supply run is a fail. Only one I found didn't have enough power on the 12 volt rail to run my rig. I'll have to try again at lunch time to find something.
Update 2: It lives.... It lives!
Found a 600w thermaltake power supply at worstbuy. I was desperate to get back up and running because lets face it, laptops suck. Desktop for life!! woo!
 um... yeah. There isn't anything special about it but I'm able to boot again now. No idea if it has the juice to sustain my normal power load. I think this is a single 12v rail unit. I only hooked up the parts I need to have running right now. I'm not even putting it back together until the replacement using shows up. Also this thing is a mess.
Monday, October 8, 2012
DIY - Three LCD Stand continued

The stand has been assembled. I need to get all the monitors and get them installed and it will be good to go.
I was originally going to make the base out of wood and then use black laminate to match it to my desk but decided to go ahead and just use pipe for the whole thing. This approach makes it a bit more mobile since the stands footprint is smaller. My stand is half galvanized and have black steel/iron 1/2" piping. Lowes was not very well stocked when I did my shopping. I would have preferred all black steel because its looks gunmetal grey after you wipe it down. Not a big deal though because you really can't see the top half when its assembled.
Purchase list for my setup.
5 x 10" nipple
2 x 18" extension
2 x 6" nipple
4 x 45° Elbows
2 x caps (optional)
1 x plug (optional)
1 x tee (2 optional)
1 x star (0 optional)
6 x 1/2" conduit couplers/clamps
3 x flush mount VESA wall brackets (usually come with install hardware)
6 x machine screws (I used the screws included with the brackets)
6 x nuts for the screws (bought the size that matched the screws)

The center mount has been drilled to allow for room around the star connecting the pipe. The other two are stock.
One monitor installed :)

Thursday, October 4, 2012
DIY - Three LCD Stand
Ok, I decided to take the plunge. I'm going to upgrade from two monitors to three. My current setup is two Samsung syncmasters. I have a 22in and a 20in. Working with two monitors is a big step up. Recently though I've been feeling like the desktop has been a bit cluttered. You know what they say you can never have enough screen real estate. I got the upgrade itch, so this time around I'm going with three 23in monitors. I just purchased the first new monitor I'll be using. I got an Asus monitor with a TN panel running at 1920x1080. I'll be grabbing two more when I see a good sale price on them(I'll get the IPS panel version if they show up for cheap).
The problem with this idea is that the monitor stands end up taking up a fair amount of desk space and don't keep them oriented at the same angles all the time. I went looking online for a simple three monitor stand and wouldn't you know it most of them are over $200. That just seemed silly for a piece of metal that holds your screen in the air. I realize that most of them have crazy articulation and rotation and all that but honestly. I don't need that so why would I want to spend a bunch of money for features I don't need. Anywho!
The first place google took me was to this link: Here
I liked the piping idea for a stand but wasn't really happy with the execution. I don't know about any one else but having to assemble my whole rig and then screw it to the desk doesn't really work well for my setup. And lets not even go into what you would need to do any time you needed to change something.
The next Internet search stop was Overclock.net with another pipe based stand. This one has a base plate installed on it so its not mounted to the desk. Nice upgrade to the idea. Not into the whole cut your own VESA blocks and then glue them together part but you do what you got to do right.
Followed by another stop at overclock.net which is another version of pipe screwed to the desk.
I saw another setup where they used a tee and two elbows to make a base. Couldn't refind it add the link though. :( Anyway, I am going to try using all piping with three flush mount VESA wall plates attached to conduit couplers and see how it goes. Update soonish. :)
Borderlands Loot chest computer case.
I've decided that since I've never really been overly thrilled with any computer case I've ever bought it was time to do something about it. So I will be making my next computer case instead of buying one. We'll see how that turns out.
I had an idea for a nuka cola machine computer case. Recently though, since I've been playing the Borderlands 2, I've been leaning more towards making a loot chest computer case. We'll see how long this idea lasts and if it comes to be. If so work-log will be here and I'll probably post it around some other places that do case mods if its any good.
Reference images:
 |  |
 |  |
Subscribe to:
Posts (Atom)